

Final Reassembly

 The first step in assembly was to get the rear wings on the car. They, as well as the fronts,
were hanging over saw horses. The fronts were pretty stable but the rears, having very little
mounting flanges, were rather precarious. The slightest bump could knock one off ending with
disastrous results. The bonnet was alone on my work table, also a bit vulnerable. The bonnet
aprons were safely on top of my shelving units. Light buckets and other small parts were
safely inside the car.
The first step in assembly was to get the rear wings on the car. They, as well as the fronts,
were hanging over saw horses. The fronts were pretty stable but the rears, having very little
mounting flanges, were rather precarious. The slightest bump could knock one off ending with
disastrous results. The bonnet was alone on my work table, also a bit vulnerable. The bonnet
aprons were safely on top of my shelving units. Light buckets and other small parts were
safely inside the car.
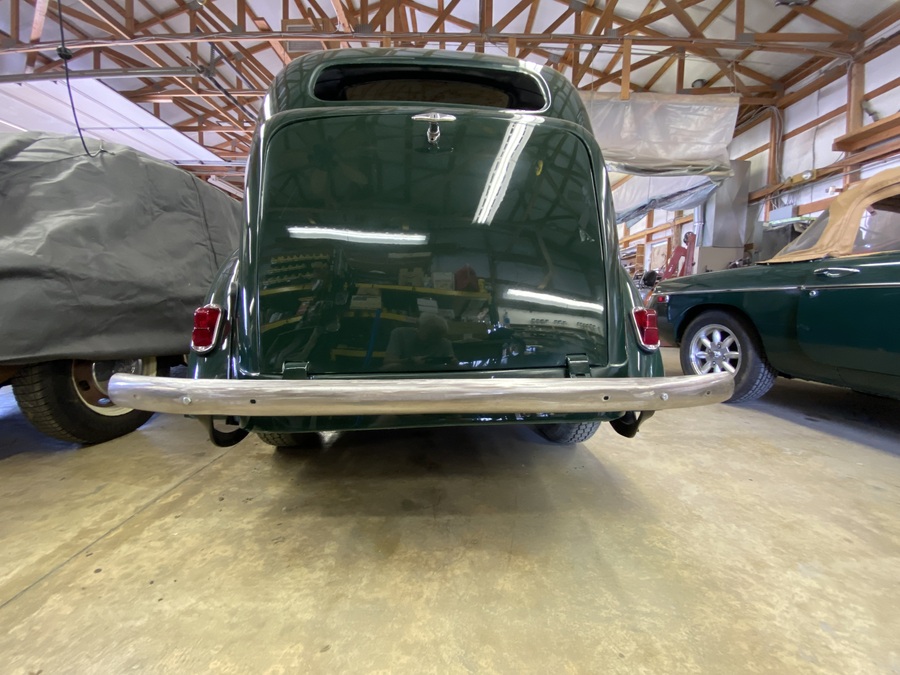
Before anything could be attached, however, I felt like it was necessary to polish the body as well as the parts to be attached. See polishing here. With that done, I finally got the rear wings on. I had in storage enough welting for the rears but had to punch holes for the bolts, of course. Sometime after primer and before painting, I cut the necessary holes and fit the new tail lights to the rear wings. Here they are finally installed.

 With the rear wings safely installed, the fronts were the next order of business. This was a
bit trickier as they are bulky, heavy and initially only attached at the rear quarter or so.
Therefore, I first partially installed the brackets to the frame that support the headlights
as well as the wings. Then I could sort of hang the wings on the supports while getting one
of the bolts at the back installed. After the wings were loosely in place, the aprons were
next. They attach to the wings as well as a single screw at the top, back corner. The left
photo here shows some of the detail of the aprons. They fill the gap between the bonnet,
grille and wings.
With the rear wings safely installed, the fronts were the next order of business. This was a
bit trickier as they are bulky, heavy and initially only attached at the rear quarter or so.
Therefore, I first partially installed the brackets to the frame that support the headlights
as well as the wings. Then I could sort of hang the wings on the supports while getting one
of the bolts at the back installed. After the wings were loosely in place, the aprons were
next. They attach to the wings as well as a single screw at the top, back corner. The left
photo here shows some of the detail of the aprons. They fill the gap between the bonnet,
grille and wings.
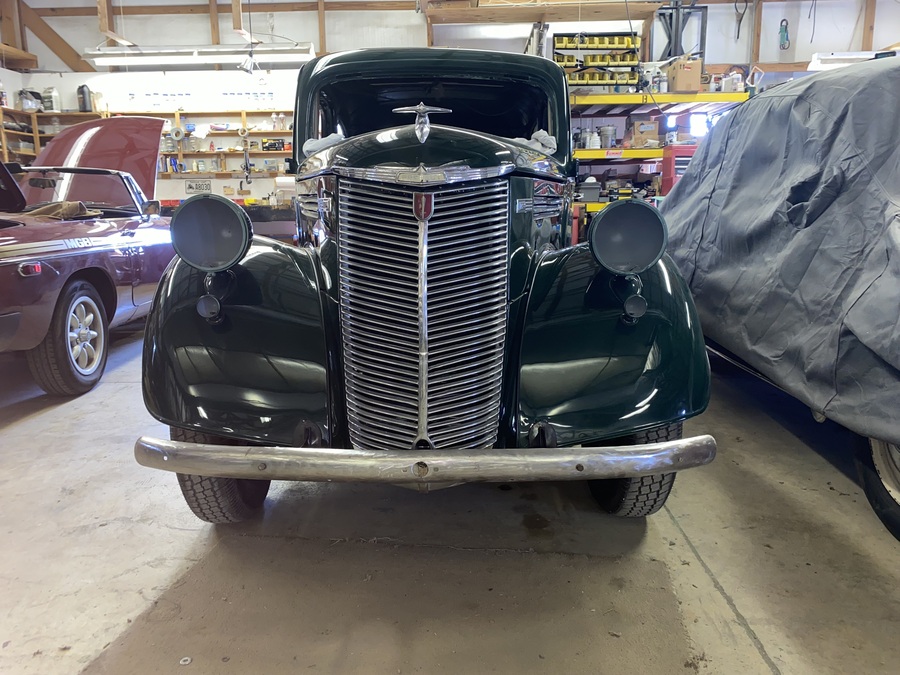
Then came the grille. It attaches to the aprons along the sides. There is another apron at the bottom of the grille that attaches to the frame. Then the slam panel at the top also extends along both sides and attaches to the aprons. Most of these bolts are hard to reach at best. Some required a helper to be able to get both sides. A couple of them could only be tightened by holding the nuts with a small vise grip while working on the bolt. Finally I added the badges to the sides of the aprons and assembled the badge and latching unit on the bonnet. The right photo Shows the front end with the head lights and side lights in place and the bonnet just resting on but not attached to the hinges yet. I have not devised a plan for that yet.
 This gets most of the body back together, except for the bumpers, running boards and rubber
parts. The actual bumpers I will leave until later as they do have to be replated. That, I
will leave to their own chapter. I will include the
irons or brackets next. The rears were installed without any significant issues other than
the fuel line interfering with access to the bolts on the left side. The fronts, however,
were another story entirely. I knew that the left side was a bit longer, causing the bumper
on that side to be farther from the wing than the right side. When I first got them installed
and the bumper in place, I also discovered that the hand crank hole in the center of the
bumper was about an inch to the right of the corresponding hole in the grille. That much
misalignment was, of course, unacceptable.
This gets most of the body back together, except for the bumpers, running boards and rubber
parts. The actual bumpers I will leave until later as they do have to be replated. That, I
will leave to their own chapter. I will include the
irons or brackets next. The rears were installed without any significant issues other than
the fuel line interfering with access to the bolts on the left side. The fronts, however,
were another story entirely. I knew that the left side was a bit longer, causing the bumper
on that side to be farther from the wing than the right side. When I first got them installed
and the bumper in place, I also discovered that the hand crank hole in the center of the
bumper was about an inch to the right of the corresponding hole in the grille. That much
misalignment was, of course, unacceptable.
This meant bending or reshaping the irons enough to move the bumper into alignment with the grille. Those things are 1/4 inch thick spring steel. Bending would require a lot of heat. It turned out that my torch will produce just enough heat to get then soft enough to bend but it only lasts for 3 or 4 seconds before cooling too much. That is not enough time to safely dispose of the torch so bend with the other hand and certainly not enough time for any measurements. Of course I didn't know how much to bend anyway or what to measure. This was to be a trial-and-error procedure. The first bend was actually a little too much on both. A second bend, doing one at a time, produced satisfactory results. Here they are, attached temporarily. They still need to be polished and chrome plated. It looks like I was a little too close to the back when I took that one giving it almost a fisheye effect. I have not found the box with the overriders yet although I know it is here; I have seen it recently.
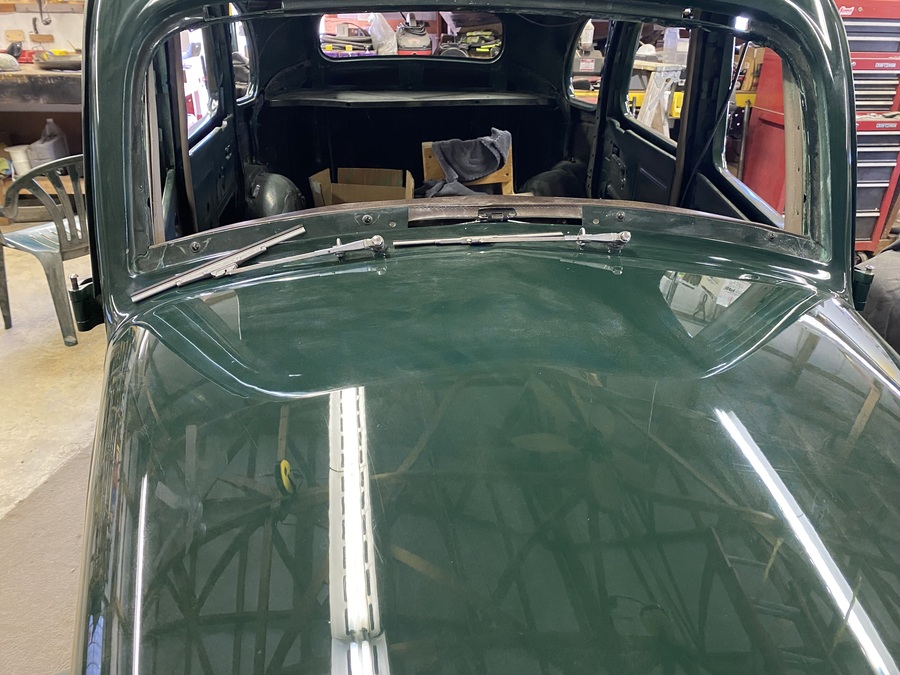 The next step was to reassemble the dash and all its components. The instrument panel had
to be pulled a few inches to access the wiper mechanism and the windscreen opener that are
all mounted behind it and to the scuttle and firewall.There were no major challenges but
it is all rather fiddly. The wipers, in particular, are cobbled together from adapters and
brackets that I built to adapt the electric Lucas motor and drive cable to the existing
vacuum actuators.After getting everything back in place, I carefully pushed the instrument
panel back in and called this part "finished". The motor and cable install from
under the bonnet so I will leave that to the appropriate
chapter. I believe the windscreen can now be installed.
The next step was to reassemble the dash and all its components. The instrument panel had
to be pulled a few inches to access the wiper mechanism and the windscreen opener that are
all mounted behind it and to the scuttle and firewall.There were no major challenges but
it is all rather fiddly. The wipers, in particular, are cobbled together from adapters and
brackets that I built to adapt the electric Lucas motor and drive cable to the existing
vacuum actuators.After getting everything back in place, I carefully pushed the instrument
panel back in and called this part "finished". The motor and cable install from
under the bonnet so I will leave that to the appropriate
chapter. I believe the windscreen can now be installed.
Well, it finally came time to finish the running boards. I started restoration on them way
back in Prep and Paint Underside and much of this
probably better fits there but that gets things way out of order so I'm putting it here. I
 was assured by my paint vendor and the local trim supply that contact cement is the way to
do it so I purchased a can of vinyl top contact cement from the trim supply and gave it a
try with near total failure. It works probably well enough on a flat surface but if the
rubber has any incentive to lift, it will. The cement just does not stick to rubber with
enough tenacity to overcome the slightest resistance. The rubber has to curve over the
rounded outer edge and, although not a tight curve, it is not enthusiastic about doing so.
The final answer was to get a tube of Loctite Marine sealant and reglue all the outer edges
with it. This actually works but the cure time is 24 hours and it must be clamped during
that time. Also, the glue is white so any even slightly exposed glue has to be painted. I
ended up with the Loctite along all edges.
was assured by my paint vendor and the local trim supply that contact cement is the way to
do it so I purchased a can of vinyl top contact cement from the trim supply and gave it a
try with near total failure. It works probably well enough on a flat surface but if the
rubber has any incentive to lift, it will. The cement just does not stick to rubber with
enough tenacity to overcome the slightest resistance. The rubber has to curve over the
rounded outer edge and, although not a tight curve, it is not enthusiastic about doing so.
The final answer was to get a tube of Loctite Marine sealant and reglue all the outer edges
with it. This actually works but the cure time is 24 hours and it must be clamped during
that time. Also, the glue is white so any even slightly exposed glue has to be painted. I
ended up with the Loctite along all edges.
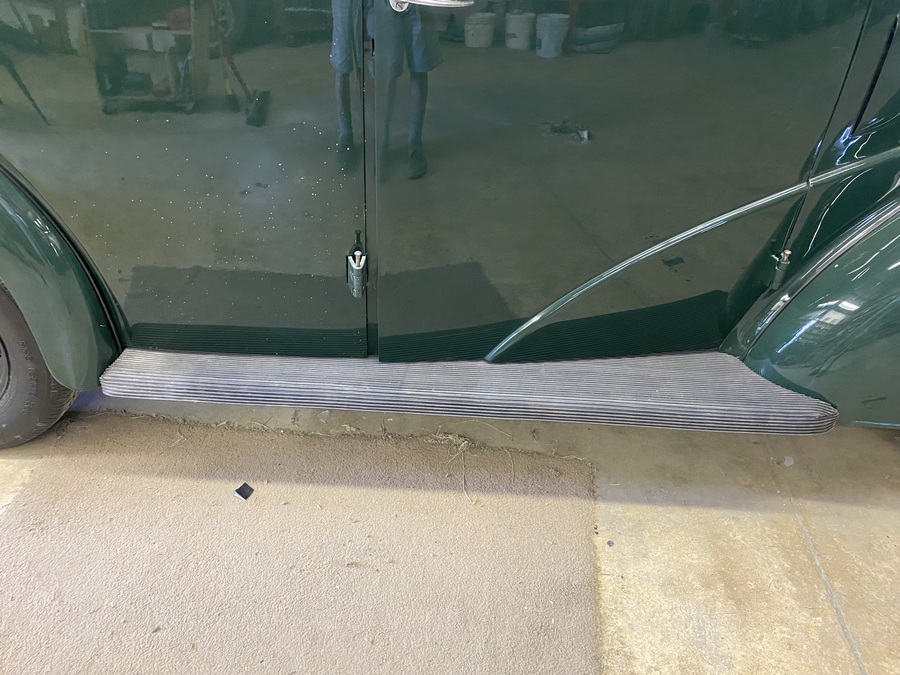
Installing that first running board turned out to be more problematic than I anticipated. I
started by supporting the rear and loosely bolting the front end to the front wing. Then
there are several bolts along the inner edge attaching it to the frame rail. These holes
failed to align by about 1/4 inch, indicating the board needed to move forward by that
amount. This presented another problem in that there was already a gap of more that 1/4
inch between the back end of the board and the rear wing. Also, at the front, lower section
of the rear wing there is not a definite line indicating where it aligns with the body. I
estimated that from obvious lines further up and back. I estimated wrong. The lower section
had to be extracted 1/2 inch or more to align with the board. Pulling that much out from
 the wheel well exposed some paint that had not been polished. I had to remove the wing to
polish it then reinstall properly aligned with the running board. After considerable fiddling
with all related bits, it finally went together and looks great.
the wheel well exposed some paint that had not been polished. I had to remove the wing to
polish it then reinstall properly aligned with the running board. After considerable fiddling
with all related bits, it finally went together and looks great.
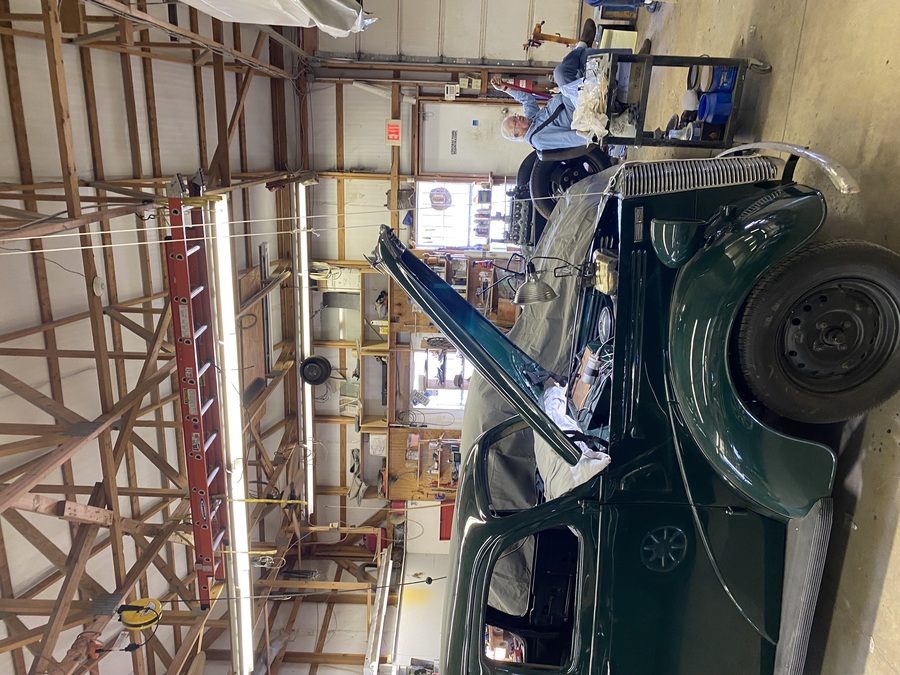
With one board installed, I temporarily lost access to the common area so I turned my attention to the bonnet. I strung a rope over the roof truss at the front and tied it to the front of the bonnet, using a proper bowline, of course. Then I laid a blanket over the scuttle and with two helpers lifting and protecting the back corners, I lifted the front with the rope, raised the hinges by hand and set the back of the bonnet in close proximity to their respective final positions. With the helpers still holding the corners, I loosely installed one bolt on each side to restrain the bonnet from touching the scuttle. I had purchased eight new 5/16-32 x 3/4 inch bolts for the job. Before tightening any, I decided they would be too long and would damage the outer skin before bottoming out. New 1/2 inch bolts were to be the answer. Here it is with the rope still attached and the blanket still on the scuttle. There is at least one bolt at each hinge so it is at least stable as long as the rope is attached. That is one of the helpers taking a well justified break in the distance. After some fiddling again and three or four attempts, the bonnet fit nicely. The off side looked great. The near side exposed too much gap between the bonnet and its apron. All the bolts holding the wing and apron had to be loosened to lift the whole system nearly 1/4 inch.